Quickstart
Requirements
-
Cluster with Slurm >= 23.11 [1] and accounting enabled
-
Host installed with a supported GNU/Linux distributions among:
-
CentOS
-
Almalinux
-
RockyLinux
-
Fedora
-
RHEL
-
Debian
-
Ubuntu
-
-
LDAP directory (for authentication)
Install slurmrestd
Slurm-web extracts Slurm information from the REST API provided its slurmrestd
daemon. This daemon must be installed on the host. The installation method
depends on the origin of Slurm packages deployed on the cluster:
-
SchedMD RPM packages
-
EPEL
-
SchedMD Deb packages
-
Debian
On clusters deployed with SchedMD official RPM packages, install slurmrestd
daemon with this command:
# dnf install slurm-slurmrestd| Please refer to SchedMD official Slurm installation guide for more help. |
On clusters deployed with RPM packages from EPEL community,
install slurmrestd daemon with this command:
# dnf install slurm-slurmrestdOn clusters deployed with SchedMD official Deb packages, install slurmrestd
daemon with this command:
# apt install slurm-smd-slurmrestd| Please refer to SchedMD official Slurm installation guide for more help. |
On clusters deployed with RPM packages from Debian community, install
slurmrestd with this command:
# apt install slurmrestdSetup slurmrestd
Create /etc/systemd/system/slurmrestd.service.d/slurm-web.conf
drop-in configuration override for slurmrestd service:
[Service]
# Unset vendor unit ExecStart to avoid cumulative definition
ExecStart=
Environment=
# Disable slurm user security check
Environment=SLURMRESTD_SECURITY=disable_user_check
ExecStart=/usr/sbin/slurmrestd $SLURMRESTD_OPTIONS -a rest_auth/local unix:/run/slurmrestd/slurmrestd.socket
RuntimeDirectory=slurmrestd
RuntimeDirectoryMode=0755
User=slurm
Group=slurm
With this configuration, slurmrestd listens for incoming connections on
Unix socket with local authentication method. It is also possible to configure
slurmrestd to listen on TCP/IP with JWT authentication, please refer to
slurmrestd configuration page for more details.
|
Make systemd reload units changes on disk:
# systemctl daemon-reloadEnable and start slurmrestd service:
# systemctl enable --now slurmrestd.serviceTo check slurmrestd daemon is properly running, run this command:
# curl --unix-socket /run/slurmrestd/slurmrestd.socket http://slurm/slurm/v0.0.40/diag
{
   "meta": {
     "plugin": {
      "type": "openapi\/slurmctld",
      "name": "Slurm OpenAPI slurmctld",
      "data_parser": "data_parser\/v0.0.40",
      "accounting_storage": "accounting_storage\/slurmdbd"
    },
   }
  …
}
In case of failure, please refer to troubleshooting guide for help.
Install Slurm-web
| For simplicity reason, this quickstart guide provides a simple installation method with distribution system packages compatible with most environments. Please refer the complete Installation Guide for more detailed installation methods. |
DNF
This procedure works on RHEL, CentOS, Rocky Linux and AlmaLinux OS,
|
On RHEL, CentOS and Rocky Linux some dependencies are missing in standard distribution repositories. You must enable EPEL repositories to get all requirements on these distributions: |
Download and save RPM repository kerying:
# curl https://pkgs.rackslab.io/keyring.asc --output /etc/pki/rpm-gpg/RPM-GPG-KEY-RackslabCreate DNF repository file /etc/yum.repos.d/rackslab.repo with this
content:
-
RHEL 8
-
RHEL 9
-
Fedora 41
-
Fedora 42
| These packages are also compatible with CentOS 8, Rocky Linux 8 and AlmaLinux OS 8. |
[rackslab]
name=Rackslab
baseurl=https://pkgs.rackslab.io/rpm/el8/main/$basearch/
gpgcheck=1
gpgkey=file:///etc/pki/rpm-gpg/RPM-GPG-KEY-Rackslab

[rackslab-slurmweb-4]
name=Rackslab slurmweb-4
baseurl=https://pkgs.rackslab.io/rpm/el8/slurmweb-4/$basearch/
gpgcheck=1
gpgkey=file:///etc/pki/rpm-gpg/RPM-GPG-KEY-Rackslab| These packages are also compatible with CentOS 9, Rocky Linux 9 and AlmaLinux OS 9. |
[rackslab]
name=Rackslab
baseurl=https://pkgs.rackslab.io/rpm/el9/main/$basearch/
gpgcheck=1
gpgkey=file:///etc/pki/rpm-gpg/RPM-GPG-KEY-Rackslab

[rackslab-slurmweb-4]
name=Rackslab slurmweb-4
baseurl=https://pkgs.rackslab.io/rpm/el9/slurmweb-4/$basearch/
gpgcheck=1
gpgkey=file:///etc/pki/rpm-gpg/RPM-GPG-KEY-Rackslab
[rackslab]
name=Rackslab
baseurl=https://pkgs.rackslab.io/rpm/fc41/main/$basearch/
gpgcheck=1
gpgkey=file:///etc/pki/rpm-gpg/RPM-GPG-KEY-Rackslab
[rackslab-slurmweb-4]
name=Rackslab
baseurl=https://pkgs.rackslab.io/rpm/fc41/slurmweb-4/$basearch/
gpgcheck=1
gpgkey=file:///etc/pki/rpm-gpg/RPM-GPG-KEY-Rackslab[rackslab]
name=Rackslab
baseurl=https://pkgs.rackslab.io/rpm/fc42/main/$basearch/
gpgcheck=1
gpgkey=file:///etc/pki/rpm-gpg/RPM-GPG-KEY-Rackslab
[rackslab-slurmweb-4]
name=Rackslab
baseurl=https://pkgs.rackslab.io/rpm/fc42/slurmweb-4/$basearch/
gpgcheck=1
gpgkey=file:///etc/pki/rpm-gpg/RPM-GPG-KEY-RackslabInstall Slurm-web agent and gateway packages:
# dnf install slurm-web-agent slurm-web-gatewayAll dependencies are automatically installed.
APT
Download and install packages repository signing key:
# curl -sS https://pkgs.rackslab.io/keyring.asc | gpg --dearmor | tee /usr/share/keyrings/rackslab.gpg > /dev/nullCreate APT sources file /etc/apt/sources.list.d/rackslab.sources with
this content:
-
Debian 12 « bookworm »
-
Debian 13 « trixie »
-
Debian 14 « forky »
-
Debian unstable « sid »
-
Ubuntu 24.04 LTS
Types: deb
URIs: https://pkgs.rackslab.io/deb
Suites: bookworm
Components: main slurmweb-4
Architectures: amd64
Signed-By: /usr/share/keyrings/rackslab.gpg
Types: deb
URIs: https://pkgs.rackslab.io/deb
Suites: trixie
Components: main slurmweb-4
Architectures: amd64
Signed-By: /usr/share/keyrings/rackslab.gpgTypes: deb
URIs: https://pkgs.rackslab.io/deb
Suites: forky
Components: main slurmweb-4
Architectures: amd64
Signed-By: /usr/share/keyrings/rackslab.gpgTypes: deb
URIs: https://pkgs.rackslab.io/deb
Suites: sid
Components: main slurmweb-4
Architectures: amd64
Signed-By: /usr/share/keyrings/rackslab.gpgTypes: deb
URIs: https://pkgs.rackslab.io/deb
Suites: ubuntu24.04
Components: main slurmweb-4
Architectures: amd64
Signed-By: /usr/share/keyrings/rackslab.gpgUpdate packages repositories metadata:
# apt updateInstall Slurm-web agent and gateway packages:
# apt install slurm-web-agent slurm-web-gatewayAll dependencies are automatically installed.
Initial setup
Create agent configuration file /etc/slurm-web/agent.ini to set the
cluster name, for example:
[service]
cluster=atlas
Create gateway configuration file /etc/slurm-web/gateway.ini with
URL to the agent:
[agents]
url=http://localhost:5012
By default, Slurm-web agent listens on port TCP/5012 of loopback network
interface. This can be changed with port parameter in
service section of agent configuration.
|
JWT signing key
Slurm-web authenticates users with JSON Web Token (JWT) for communications between its components. A secret key is required to cryptographically sign generated tokens. Run this command to generate this key:
# /usr/libexec/slurm-web/slurm-web-gen-jwt-key
INFO ⸬ Running slurm-web-gen-jwt-key
INFO ⸬ Generating JWT private key file /var/lib/slurm-web/jwt.key
INFO ⸬ Setting read permission on key for slurm-web user
INFO ⸬ Setting read permission on key for slurm userFirst Access
Slurm-web is now ready to start! Enable and start the agent and gateway native services:
# systemctl enable --now slurm-web-agent.service
# systemctl enable --now slurm-web-gateway.service
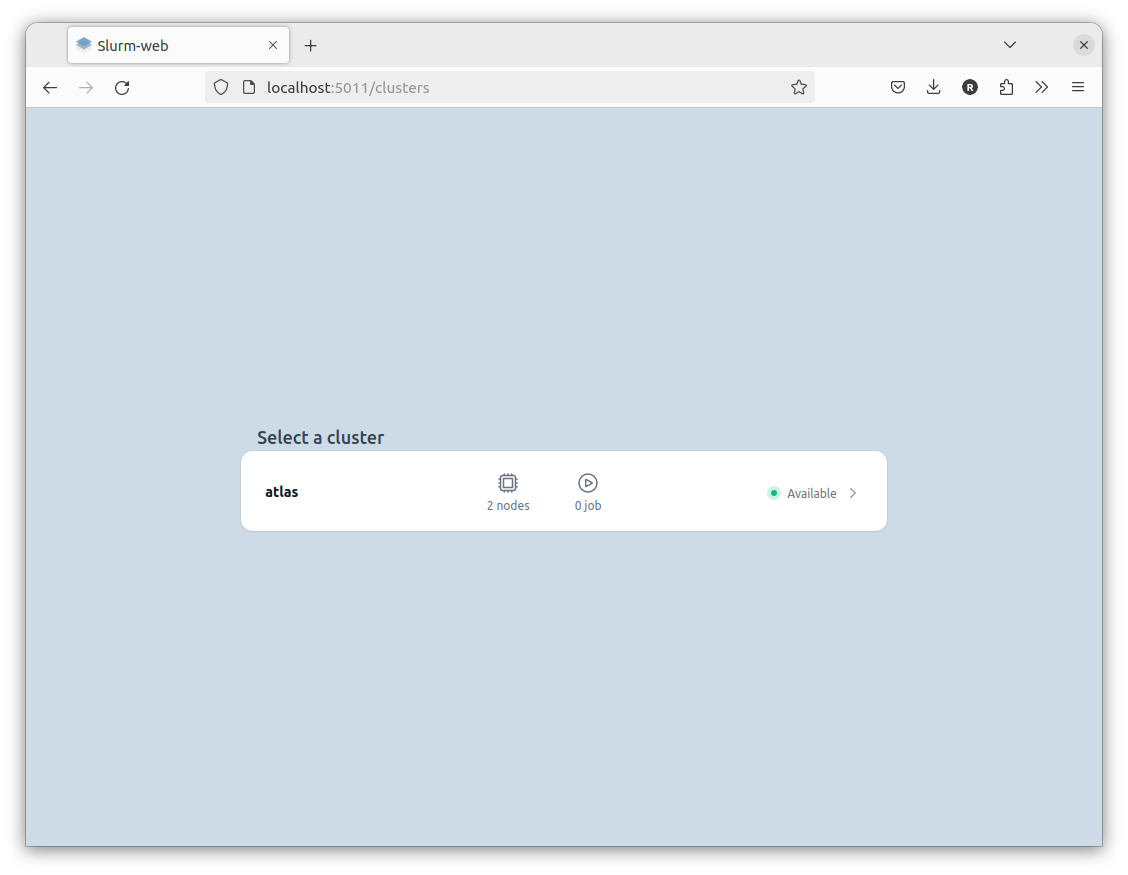
Connect your browser to the gateway on http://localhost:5011. You should see the configured cluster:
|
By default, Slurm-web gateway native service listens for incoming network
connections on port TCP/5011. This can be changed with Also, the gateway native service is binded to loopback network interface by
default. It restricts access to localhost for security reason. It is recommended
to setup production HTTP server for external access to
Slurm-web. However, this can be changed anyway with the following lines in
gateway configuration file Real values depend on the DNS hostname or the public IP address of the host. Slurm-web is now be available on: http://HOSTNAME_OR_IP:5011 Please refer to gateway configuration reference documentation for more details. |
| In case of failure, please refer to troubleshooting guide for help. |
Setup authentication
To restrict access to the dashboard, you must enable authentication. Slurm-web supports LDAP authentication.
Add the following settings in the gateway configuration file
/etc/slurm-web/gateway.ini:
[authentication]
enabled=yes

[ldap]
uri=ldap://SERVER
user_base=ou=PEOPLE,dc=EXAMPLE,dc=TLD
group_base=ou=GROUPS,dc=EXAMPLE,dc=TLDSERVER, user and groups search bases must be adapted to match your LDAP server
and directory tree.
|
Slurm-web also supports LDAPS (SSL/TLS) and STARTTLS secured protocols with LDAP servers. The groups of users permitted to authenticate on Slurm-web can also be
restricted with Please refer to reference documentation of
|
Restart gateway service to apply the new configuration:
# systemctl restart slurm-web-gateway.serviceThe authentication form is now presented on Slurm-web access:
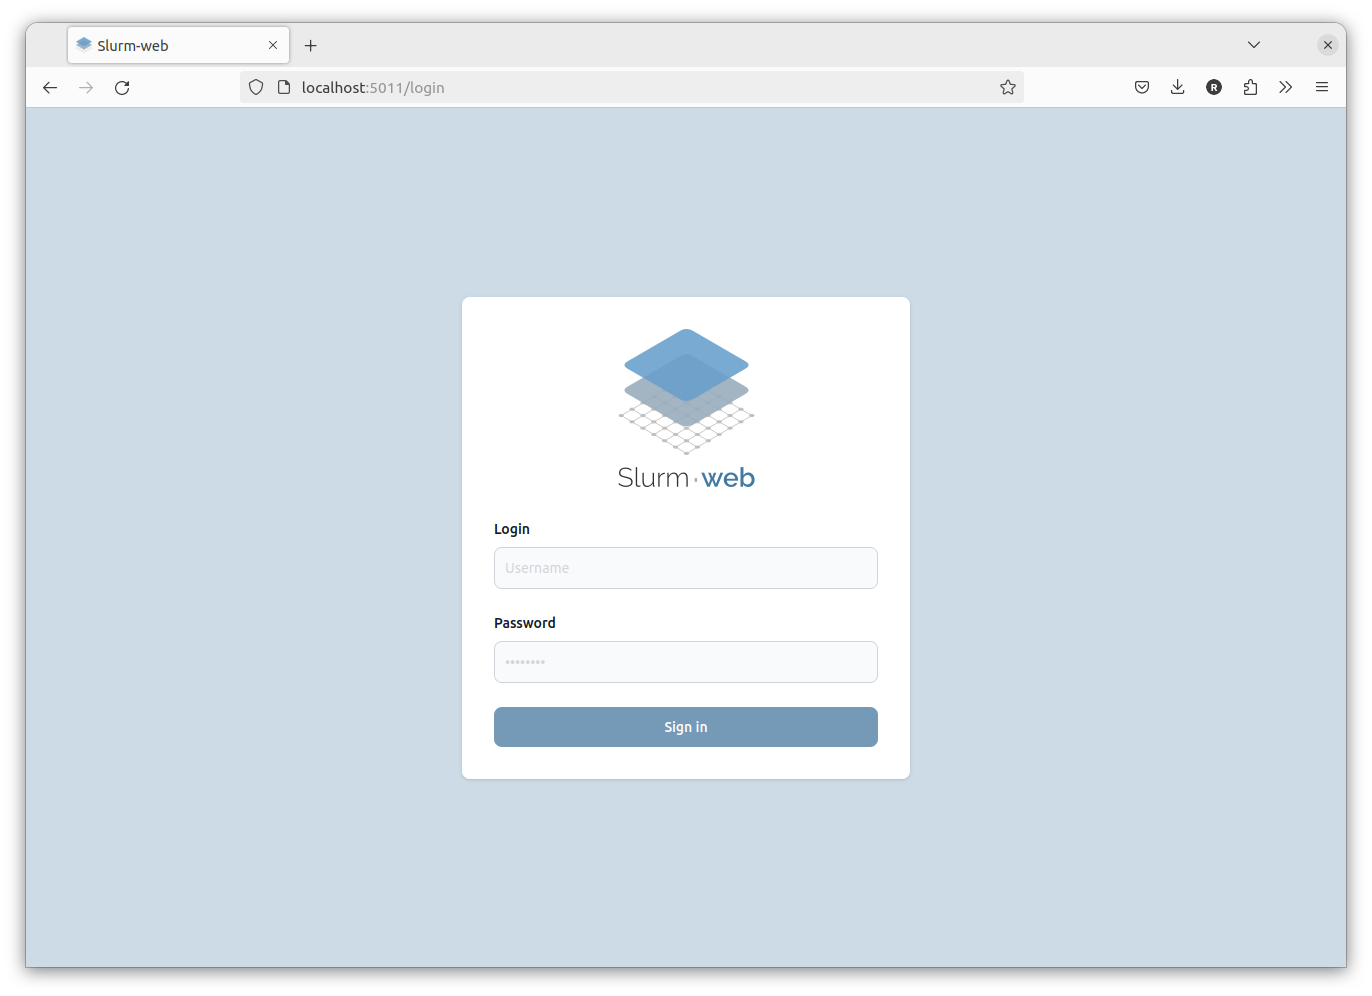
Upon successfull LDAP authentication, users have access to the clusters.
Any problem to setup LDAP authentication?
slurm-web-ldap-check utility
might help. More details in Troubleshooting
page.
|
Setup policy
At this stage, the agent is running with default authorization policy. You can
create a file /etc/slurm-web/policy.ini to define your custom RBAC
fine-grain policy with specific roles.
Consider this example:
[roles]
user=@biology
admin=jwalls

[user]
actions=view-stats,view-jobs,view-nodes

[admin]
actions=view-partitions,view-qos,view-accounts,view-reservations
This policy defines two roles:
-
user for members of biology group. This role has permission on
view-stats,view-jobsandview-nodesactions. -
admin for jwalls user. This role has permission on
view-partitions,view-qos,view-accountsandview-reservationsactions.
| Please refer to Authorization policy reference documentation for description of all available actions and the corresponding permissions granted in user interface. |
Restart the agent component to apply the new configuration:
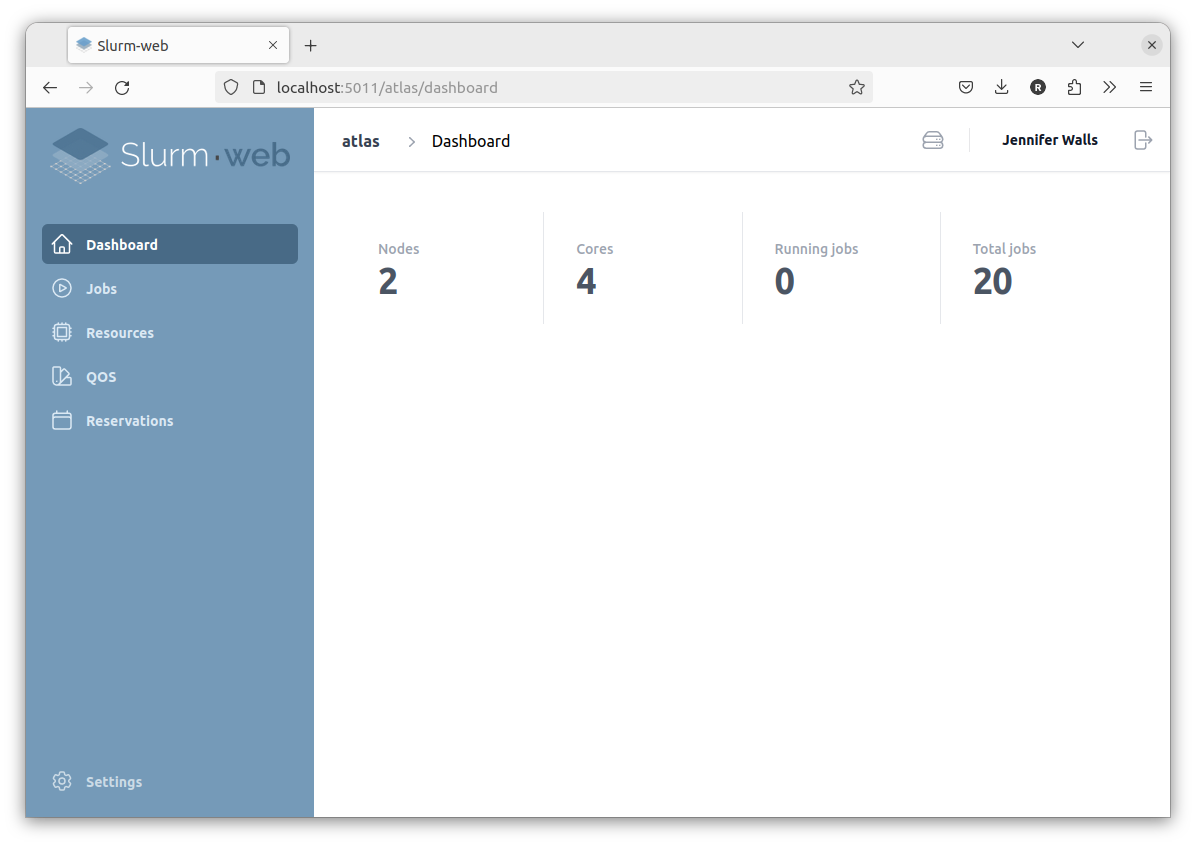
# systemctl restart slurm-web-agent.serviceUser jwalls who is also member of biology group is granted both user and admin roles, she has access to everything:
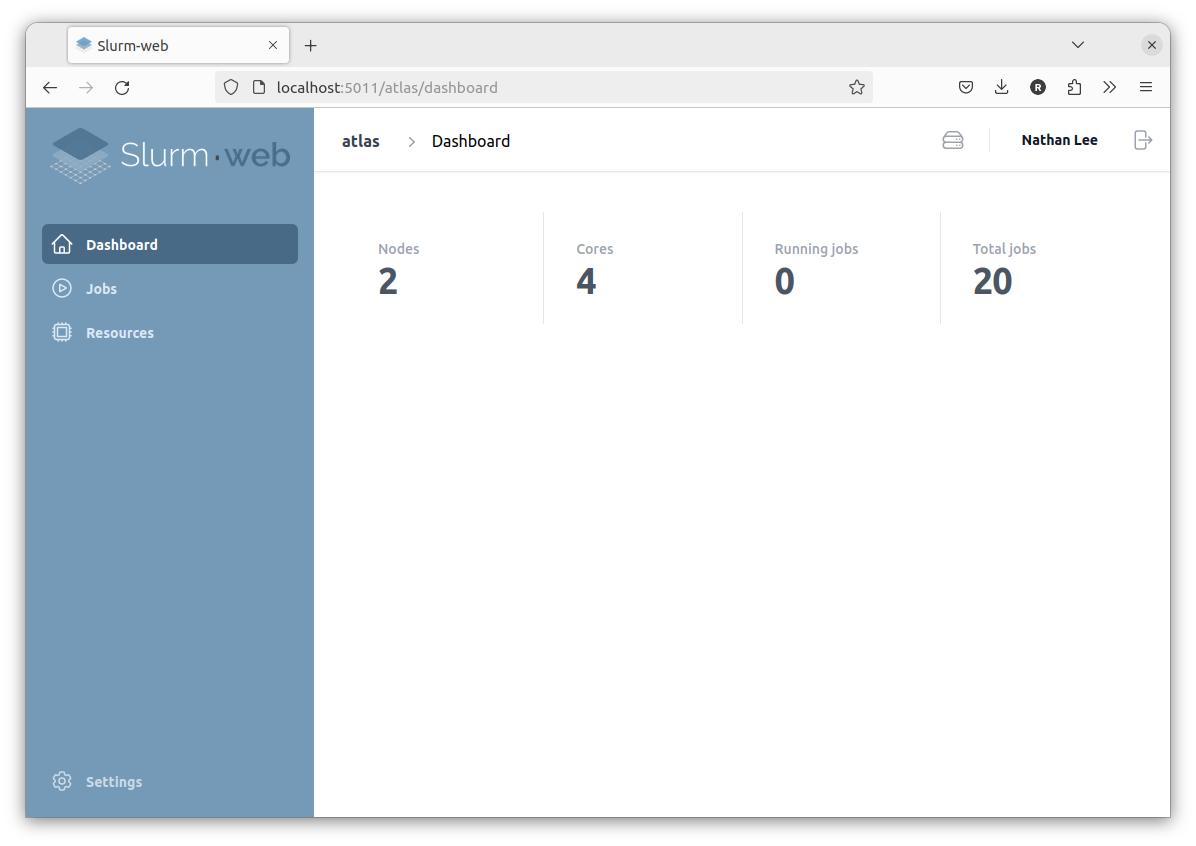
Another user in biology group can only view jobs and resources:
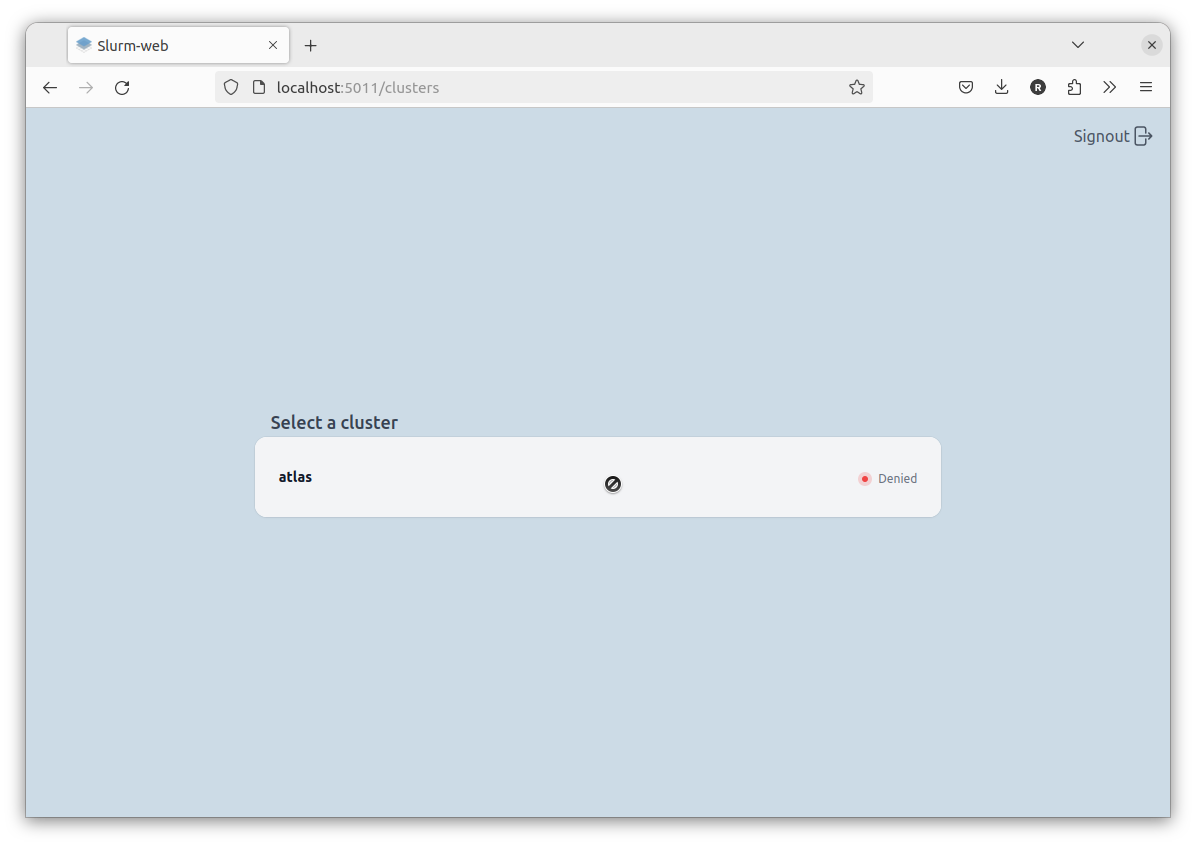
Access to the cluster is denied to all other users:
Setup cache
Slurm-web has a transparent caching feature which can use Redis (or any compatible alternative) in-memory database to cache Slurm responses.
| It is highly recommended to setup cache on Slurm-web agent to significantly reduce the amount of repetitive requests sent to Slurm and reduce its load. |
Install Redis:
-
APT
-
DNF
For RHEL, CentOS, Rocky Linux and AlmaLinux OS, run this command:
# dnf install redisStart and enable the service:
# systemctl enable --now redis.serviceEdit agent configuration file /etc/slurm-web/agent.ini to enable
cache:
[cache]
enabled=yes
It is also possible to setup a remote Redis server, configure a password
to access a server secured in protected mode or adjust cache timeouts. More
details in
cache section of agent configuration file.
|
Production HTTP server
At this stage, Slurm-web is served by a Python HTTP server which is not designed for production requirements. The performances are not optimal and network communications are not secured with SSL/TLS certificate. This setup is not recommended for production. It is recommended to setup a production HTTP server such as Nginx, Apache or Caddy to launch Slurm-web as a WSGI application.
| For simplicity reason, this quickstart guide gives only the procedure to setup Nginx but documentation is available for other supported HTTP servers. |
Stop and disable Slurm-web native services:
# systemctl disable --now slurm-web-agent.service slurm-web-gateway.serviceEdit gateway configuration file /etc/slurm-web/gateway.ini:
[ui]
host=http://DNS_HOSTNAME

[agents]
url=http://localhost/agent
Real values depend on the DNS hostname of the host.
The [service] section can be safely removed now as it is ignored when
Slurm-web is launched as WSGI applications.
|
Copy examples of uWSGI services provided in Slurm-web packages and reload units:
# cp -v /usr/share/slurm-web/wsgi/*/slurm-web-{agent,gateway}-uwsgi.service /etc/systemd/system/
# systemctl daemon-reload
Start and enable these services:
# systemctl enable --now slurm-web-agent-uwsgi.service slurm-web-gateway-uwsgi.serviceEdit Nginx site configuration to add these locations:
server {
  …

  location / {
    include uwsgi_params;
    uwsgi_pass unix:/run/slurm-web-gateway/uwsgi.sock;
  }

  location /agent/ {
    include uwsgi_params;
    rewrite ^/agent/(.*)$ /$1 break;
    uwsgi_pass unix:/run/slurm-web-agent/uwsgi.sock;
  }
}
Reload Nginx to apply new configuration:
# systemctl reload nginx.serviceSlurm-web is now available at: http://DNS_HOSTNAME/
In case of failure, please refer to troubleshooting guide for help.
RacksDB database (optional)
Slurm-web can use RacksDB to generate advanced interactive graphical representations of datacenters racks with the compute nodes. For this feature, RacksDB database must be defined with your HPC cluster infrastructure. This is actually quick and easy easy based on the examples provided.
Some requirements must be fulfilled in this database:
-
The infrastructure must have the same name as the cluster previously declared in agent configuration file.
-
The compute tag must be assigned to all compute nodes declared in Slurm configuration.
|
You can choose other tag name but you will have to declare this tag in
|
|
If you don’t need this
advanced interactive graphical representations
feature, RacksDB integration can be completely disabled with the following lines
in |
Metrics (optional)
Slurm-web offers the possibility to export Slurm metrics in OpenMetrics format and integrate with Prometheus. This feature can be used to store metrics in timeseries databases and draw diagrams of historical data.
This feature is disabled by default. It can be enabled with the following lines
in /etc/slurm-web/agent.ini:
[metrics]
enabled=yesMulti-clusters
Slurm-web is designed to support distributed setup with a central server and multiple clusters. Compared to the steps above, the following changes must be considered:
-
Install and setup
slurmrestdon all clusters. -
Install
Slurm-webagent on all clusters, colocated on the same hosts asslurmrestd. -
Install
Slurm-webgateway on the central server. -
Setup production HTTP servers with HTTPS (SSL/TLS) for all agents and the gateway.
-
Set URL of all agents in
agentssection of gateway configuration. -
Generate JWT signing key on central server and deploy this key on all agents servers (same key must be shared by all agents and the gateway).
-
Deploy RacksDB database on all agents servers.
-
Deploy custom policy on all agents servers.
-
Install Redis on all agents servers.
Et voilà!