Quickstart with Compose

This guide installs Slurm-web with the reference Compose mono-cluster stack
(agent, gateway, optional Redis and Prometheus) using docker compose or
podman compose. It is intended for a quick end-to-end evaluation.
Requirements
-
Cluster with Slurm >= 24.05 [1] and accounting enabled
-
Host with Docker Engine and the Docker Compose plugin, or Podman with
podman compose
Slurm JWT authentication
Generate random Slurm JWT signing key with restrictive permissions:
# dd if=/dev/random of=/var/spool/slurm/jwt_hs256.key bs=32 count=1
# chown slurm:slurm /var/spool/slurm/jwt_hs256.key
# chmod 0600 /var/spool/slurm/jwt_hs256.key
Edit main Slurm and SlurmDBD configuration to enable JWT alternative authentication:
AuthAltTypes=auth/jwt
AuthAltParameters=jwt_key=/var/spool/slurm/jwt_hs256.key
Restart slurmctld and slurmdbd services to update configuration:
# systemctl restart slurmctld slurmdbdInstall slurmrestd
Slurm-web extracts Slurm information from the REST API provided its slurmrestd
daemon. This daemon must be installed on the host. The installation method
depends on the origin of Slurm packages deployed on the cluster:
-
SchedMD RPM packages
-
EPEL
-
SchedMD Deb packages
-
Debian
On clusters deployed with SchedMD official RPM packages, install slurmrestd
daemon with this command:
# dnf install slurm-slurmrestd| Please refer to SchedMD official Slurm installation guide for more help. |
On clusters deployed with RPM packages from EPEL community,
install slurmrestd daemon with this command:
# dnf install slurm-slurmrestdOn clusters deployed with SchedMD official Deb packages, install slurmrestd
daemon with this command:
# apt install slurm-smd-slurmrestd| Please refer to SchedMD official Slurm installation guide for more help. |
On clusters deployed with RPM packages from Debian community, install
slurmrestd with this command:
# apt install slurmrestdSetup slurmrestd
Create /etc/systemd/system/slurmrestd.service.d/slurm-web.conf
drop-in configuration override for slurmrestd service:
[Service]
# Unset vendor unit ExecStart and Environment to avoid cumulative definition
ExecStart=
Environment=
Environment="SLURM_JWT=daemon"
ExecStart=/usr/sbin/slurmrestd $SLURMRESTD_OPTIONS -a rest_auth/jwt unix:/run/slurmrestd/slurmrestd.socket
RuntimeDirectory=slurmrestd
RuntimeDirectoryMode=0755
User=slurmrestd
Group=slurmrestd
DynamicUser=yes
With this configuration, slurmrestd listens for incoming connections on
Unix socket with jwt authentication method. It is also possible to configure
slurmrestd to listen on TCP/IP socket. Please refer to
slurmrestd configuration page for more details.
|
Make systemd reload units changes on disk:
# systemctl daemon-reloadEnable and start slurmrestd service:
# systemctl enable --now slurmrestd.serviceTo check slurmrestd daemon is properly running with JWT authentication, run
this command:
# export $(scontrol token)
# curl -H X-SLURM-USER-TOKEN:$SLURM_JWT --unix-socket /run/slurmrestd/slurmrestd.socket http://slurm/slurm/v0.0.41/diag
{
   "meta": {
     "plugin": {
      "type": "openapi\/slurmctld",
      "name": "Slurm OpenAPI slurmctld",
      "data_parser": "data_parser\/v0.0.41",
      "accounting_storage": "accounting_storage\/slurmdbd"
    },
   }
  …
}
In case of failure, please refer to troubleshooting guide for help.
Download Compose file
From your chosen working directory, download the reference Compose file from the
main branch:
$ curl -fsSL -o compose.yaml https://raw.githubusercontent.com/rackslab/Slurm-web/main/containers/compose.yamlPull the stack images:
-
Docker
-
Podman
$ docker compose pull$ podman compose pull
Pin images to a release tag in compose.yaml (for example
ghcr.io/rackslab/slurm-web-agent:v7.0.0) instead of latest for
reproducible deployments.
|
Storage layout
Agent and gateway read configuration from /etc/slurm-web/ and secrets
from /var/lib/slurm-web/ inside containers. Those paths are fixed;
what varies is how you persist files on the host.
This guide keeps configuration and secrets in local directories next to
compose.yaml:
| Host (project dir) | Container path | Purpose |
|---|---|---|
|
|
Configuration files |
|
|
Secrets (session and JWT signing keys) |
Create the project layout in your Compose working directory:
$ mkdir -p conf keysThe reference stack uses LOCAL_UID and LOCAL_GID in later commands so files
created in keys/ remain owned by your host user.
| For rootless Podman Compose, named volumes and other storage alternatives, see the containers reference installation guide. |
Initial setup
Create agent configuration file conf/agent.ini to set the
cluster name and slurmrestd URI, for example:
[service]
cluster=nova

[slurmrestd]
uri=http://SLURMRESTD_HOST:6820
Replace nova with your cluster name and SLURMRESTD_HOST with a hostname or
address reachable from the agent container (for Compose on Linux,
host.docker.internal is a common choice).
Create gateway configuration file conf/gateway.ini with
external URL to the agent:
[agents]
url=http://agent:5012Slurm-web secret keys
Before starting gateway services, generate two secret files with the
slurm-web CLI: a gateway session secret to secure server-side login state
during authentication flows, and a JSON Web Token (JWT) signing
key for authentication between Slurm-web components. Both files must be stored
in the persistent storage mounted at /var/lib/slurm-web/ in agent and
gateway containers — see Storage layout.
Generate the gateway session secret key (default
/var/lib/slurm-web/session.key) with:
-
Docker
-
Podman
$ LOCAL_UID=$(id -u) LOCAL_GID=$(id -g) docker compose run --rm gateway gen-session-key
INFO ⸬ Running slurm-web gen-session-key
INFO ⸬ Generated session key file /var/lib/slurm-web/session.key
$ LOCAL_UID=$(id -u) LOCAL_GID=$(id -g) podman compose run --rm gateway gen-session-key
INFO ⸬ Running slurm-web gen-session-key
INFO ⸬ Generated session key file /var/lib/slurm-web/session.keyGenerate the JWT signing key (default /var/lib/slurm-web/jwt.key)
with:
-
Docker
-
Podman
$ LOCAL_UID=$(id -u) LOCAL_GID=$(id -g) docker compose run --rm gateway gen-jwt-key
INFO ⸬ Running slurm-web gen-jwt-key
INFO ⸬ Generating JWT private key file /var/lib/slurm-web/jwt.key
$ LOCAL_UID=$(id -u) LOCAL_GID=$(id -g) podman compose run --rm gateway gen-jwt-key
INFO ⸬ Running slurm-web gen-jwt-key
INFO ⸬ Generating JWT private key file /var/lib/slurm-web/jwt.keySlurm JWT siging key
For Slurm-web authentication to slurmrestd, copy the Slurm JWT signing key
into the agent secrets directory as slurmrestd.key:
# cp /var/spool/slurm/jwt_hs256.key ./keys/slurmrestd.keyRestrict access to this sensitive file with read permission only:
# chmod 400 ./keys/slurmrestd.key
With this configuration, Slurm-web agent automatically generates its
tokens with short lifespan for authentication to slurmrestd. As an
alternative, Slurm-web supports static tokens. Please refer to
slurmrestd configuration page for more details.
|
To test Slurm-web agent and slurmrestd service configuration parameters, you
can run
slurm-web connect-check
command. It tries to send HTTP request to slurmrestd with Slurm-web agent
configuration parameters and reports the status. For example:
-
Docker
-
Podman
$ LOCAL_UID=$(id -u) LOCAL_GID=$(id -g) docker compose run --rm agent connect-check
✅ connection successful! (cluster: hpc, slurm: 25.11.0, api: 0.0.44)
$ LOCAL_UID=$(id -u) LOCAL_GID=$(id -g) podman compose run --rm agent connect-check
✅ connection successful! (cluster: hpc, slurm: 25.11.0, api: 0.0.44)First Access
Slurm-web is now ready to start!
Start the stack:
-
Docker
-
Podman
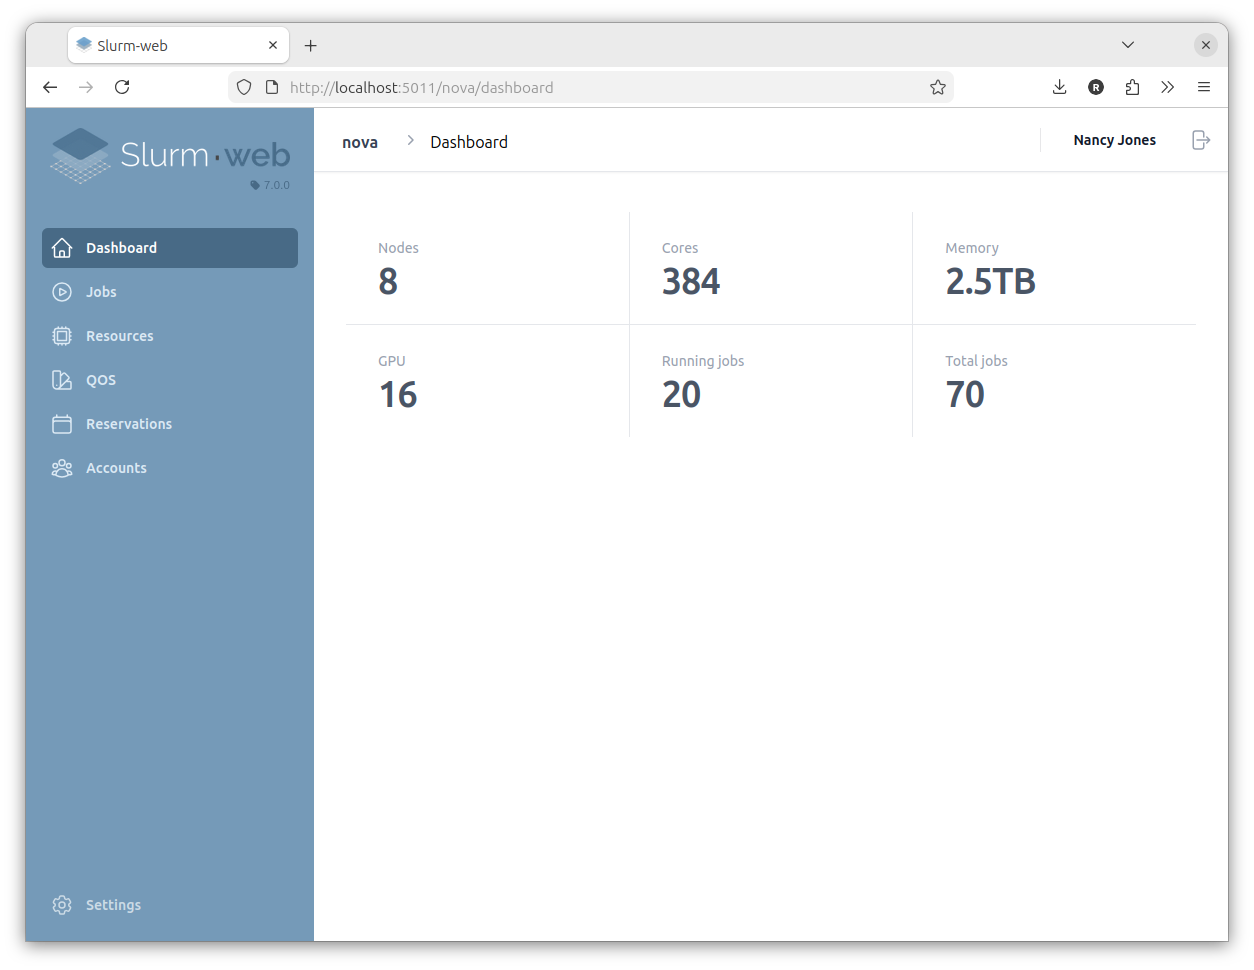
$ LOCAL_UID=$(id -u) LOCAL_GID=$(id -g) docker compose up -d$ LOCAL_UID=$(id -u) LOCAL_GID=$(id -g) podman compose up -dConnect your browser to the gateway on http://localhost:5011. You should see the dashboard of the configured cluster:
|
By default, the reference stack publishes the gateway on port TCP/5011 of the
Compose host. Adjust the The Actual values depend on your DNS hostname or the public IP address of the host. Slurm-web is now available on: http://HOSTNAME_OR_IP:5011 Please refer to gateway configuration reference documentation for more details. |
With the reference stack, the agent API is also published on port TCP/5012 of localhost. The optional Prometheus UI is available at http://localhost:9090 after Metrics is configured.
| In case of failure, please refer to troubleshooting guide for help. |
Going Further
Slurm-web is now running. The following optional sections help you improve performance, secure access, customize authorization and enable advanced features.
In-memory Cache
Slurm-web has a transparent caching feature which can use Redis (or any compatible alternative) in-memory database to cache Slurm responses.
| It is highly recommended to setup cache on Slurm-web agent to significantly reduce the amount of repetitive requests sent to Slurm and reduce its load. |
The reference Compose stack in compose.yaml includes a Redis service
commented out by default. Uncomment the redis service and the redis entry in
the agent depends_on block, then append to conf/agent.ini:
[cache]
enabled=yes
host=redis
It is also possible to setup a remote Redis server, configure a password
to access a server secured in protected mode or adjust cache timeouts. More
details in
cache section of agent configuration file.
|
Restart the stack to apply the new configuration:
-
Docker
-
Podman
$ LOCAL_UID=$(id -u) LOCAL_GID=$(id -g) docker compose up -d$ LOCAL_UID=$(id -u) LOCAL_GID=$(id -g) podman compose up -dUser Authentication
To restrict access to the dashboard, enable authentication on the gateway and choose either LDAP or OpenID Connect (OIDC). Only one method is active per deployment.
See authentication documentation for an overview and setup guides:
-
LDAP authentication — username and password against a directory (default method)
-
OIDC authentication — single sign-on with Keycloak, Authentik, or another OIDC provider
Authorization Policy
At this stage, the agent is running with default authorization policy. You can
create a file conf/policy.ini to define your custom RBAC
fine-grain policy with specific roles.
Follow Authorization policy reference documentation to learn the policy file format, review examples and choose the actions granted to each role.
RacksDB database
Slurm-web can use RacksDB to generate advanced interactive graphical representations of datacenters racks with the compute nodes. For this feature, RacksDB database must be defined with your HPC cluster infrastructure. This is actually quick and easy based on the examples provided.
Some requirements must be fulfilled in this database:
-
The infrastructure must have the same name as the cluster previously declared in agent configuration file.
-
The compute tag must be assigned to all compute nodes declared in Slurm configuration.
|
You can choose another tag name but you must declare it in
|
Create a racksdb/ directory next to your configuration directory and
add your infrastructure files:
$ mkdir -p racksdbMount racksdb/ read-only on the agent container at
/var/lib/racksdb by adding the corresponding volume in
compose.yaml:
 services:
   agent:
     volumes:
       - ./conf/agent.ini:/etc/slurm-web/agent.ini:ro
       - ./keys:/var/lib/slurm-web
+      - ./racksdb:/var/lib/racksdb:ro
Restart the stack to apply the new mount:
-
Docker
-
Podman
$ LOCAL_UID=$(id -u) LOCAL_GID=$(id -g) docker compose up -d$ LOCAL_UID=$(id -u) LOCAL_GID=$(id -g) podman compose up -d|
By default, RacksDB integration is in auto mode: the agent tries to load the database and schema and disables the feature with a warning in logs if unable to load. If you don’t need this
advanced interactive graphical representations
feature and want to suppress the warning in logs, RacksDB integration can be
disabled with the following lines in |
Metrics
Slurm-web offers the possibility to export Slurm metrics in OpenMetrics format and integrate with Prometheus. This feature can be used to store metrics in timeseries databases and draw diagrams of historical data.
This feature is disabled by default.
In compose.yaml, uncomment the prometheus service and the
prometheus entry in the agent depends_on block.
Create the Prometheus configuration directory in your Compose project:
$ mkdir -p conf/prometheusCreate conf/prometheus/prometheus.yml:
global:
  scrape_interval: 30s

scrape_configs:
  - job_name: slurm
    scrape_interval: 30s
    metrics_path: /metrics
    static_configs:
      - targets: ["agent:5012"]
Add [metrics] to conf/agent.ini:
[metrics]
enabled=yes
host=http://prometheus:9090
restrict=
  10.0.0.0/8
  172.16.0.0/12
  192.168.0.0/16
Restart the stack after adding these files:
-
Docker
-
Podman
$ LOCAL_UID=$(id -u) LOCAL_GID=$(id -g) docker compose up -d$ LOCAL_UID=$(id -u) LOCAL_GID=$(id -g) podman compose up -dThe Prometheus UI is available at http://localhost:9090 —
check Status → Targets for the slurm scrape job.
Multi-clusters
Slurm-web is designed to support distributed setup with a central server and multiple clusters. Compared to the steps above, the following changes must be considered:
-
Install and setup
slurmrestdon all clusters. -
Install
Slurm-webagent on all clusters, colocated on the same hosts asslurmrestd. -
Install
Slurm-webgateway on the central server. -
Setup production HTTP servers with HTTPS (SSL/TLS) for all agents and the gateway.
-
Set URL of all agents in
agentssection of gateway configuration. -
Generate JWT signing key on central server and deploy this key on all agents servers (same key must be shared by all agents and the gateway).
-
Deploy the RacksDB database at the default path on all agent servers (auto-loaded on restart).
-
Deploy custom policy on all agents servers.
-
Setup in-memory cache on all agents servers.
Et voilà!